| |||||||

| Search Forums |
| Advanced Search |
| Go to Page... |
 |
| Search this Thread |  1,130,453 views |
 24th April 2020, 16:31
| #556 |
| Distinguished - BHPian  | Re: My Car Hobby: A lot of fiddling, and some driving too! Jaguar XJR, Mercedes W123 & Alfa Romeo Sp This morning I took the W123 to get a wheel allignement. I had noticed for a while that it pulls slightly to the right, steering wheel is not centred either. I checked all the usual suspects, swapped wheels (which have brand new tyres), but all to no avail. So an allignement was probably in order. Even during the Corona crisis, luckily, all garages and workshops remain open. They are less busy as people just travel less and thus use their car less. I left my W123 with them and I had hoped to take some images whilst they were doing the allgnment. I went to do some shopping and when I got back 30 minutes later they were already putting the wheel hubs back on!   The report (All in Dutch I am afraid, shows the before and after measurements. And there was quite a bit of red as you can see  Alignment shops usually have fixed prices. For classic cars they tend to charge more and also have a provision if it takes more than an hour they charge for the extra time. The problem with classic cars is very often that it is difficult to loosen up the various suspension components, so it takes a lot longer. These days doing an allgnment is a pretty standardised type of job, what with computer alignment and measuring equipment. Which tends to work fine for 99% of the cars. But if there is something wrong with your car’s allignement that is a less obvious it takes real expertise to fix it. I remember I had problems with my Jaguar Alignment when I just got it, back in Kansas City. The local Jaguar dealer could not fix it and claimed the chassis was bend. I found a real allignement expert, a guy that also worked on racing cars. Took him an hour and a half and it was all perfect again. The other thing on old and classic cars; you can’t have any play on any of the suspension and steering components. It just won’t work and you will need to fix that first. So I paid and took my W123 for a little test drive. I have not been able to take it on the motorway and it was pretty windy. Still, I can notice a very significant improvement and my Steering wheel is now properly centred when driving straight ahead! So I am pretty hopeful all will be well when I take it out on the motorways! 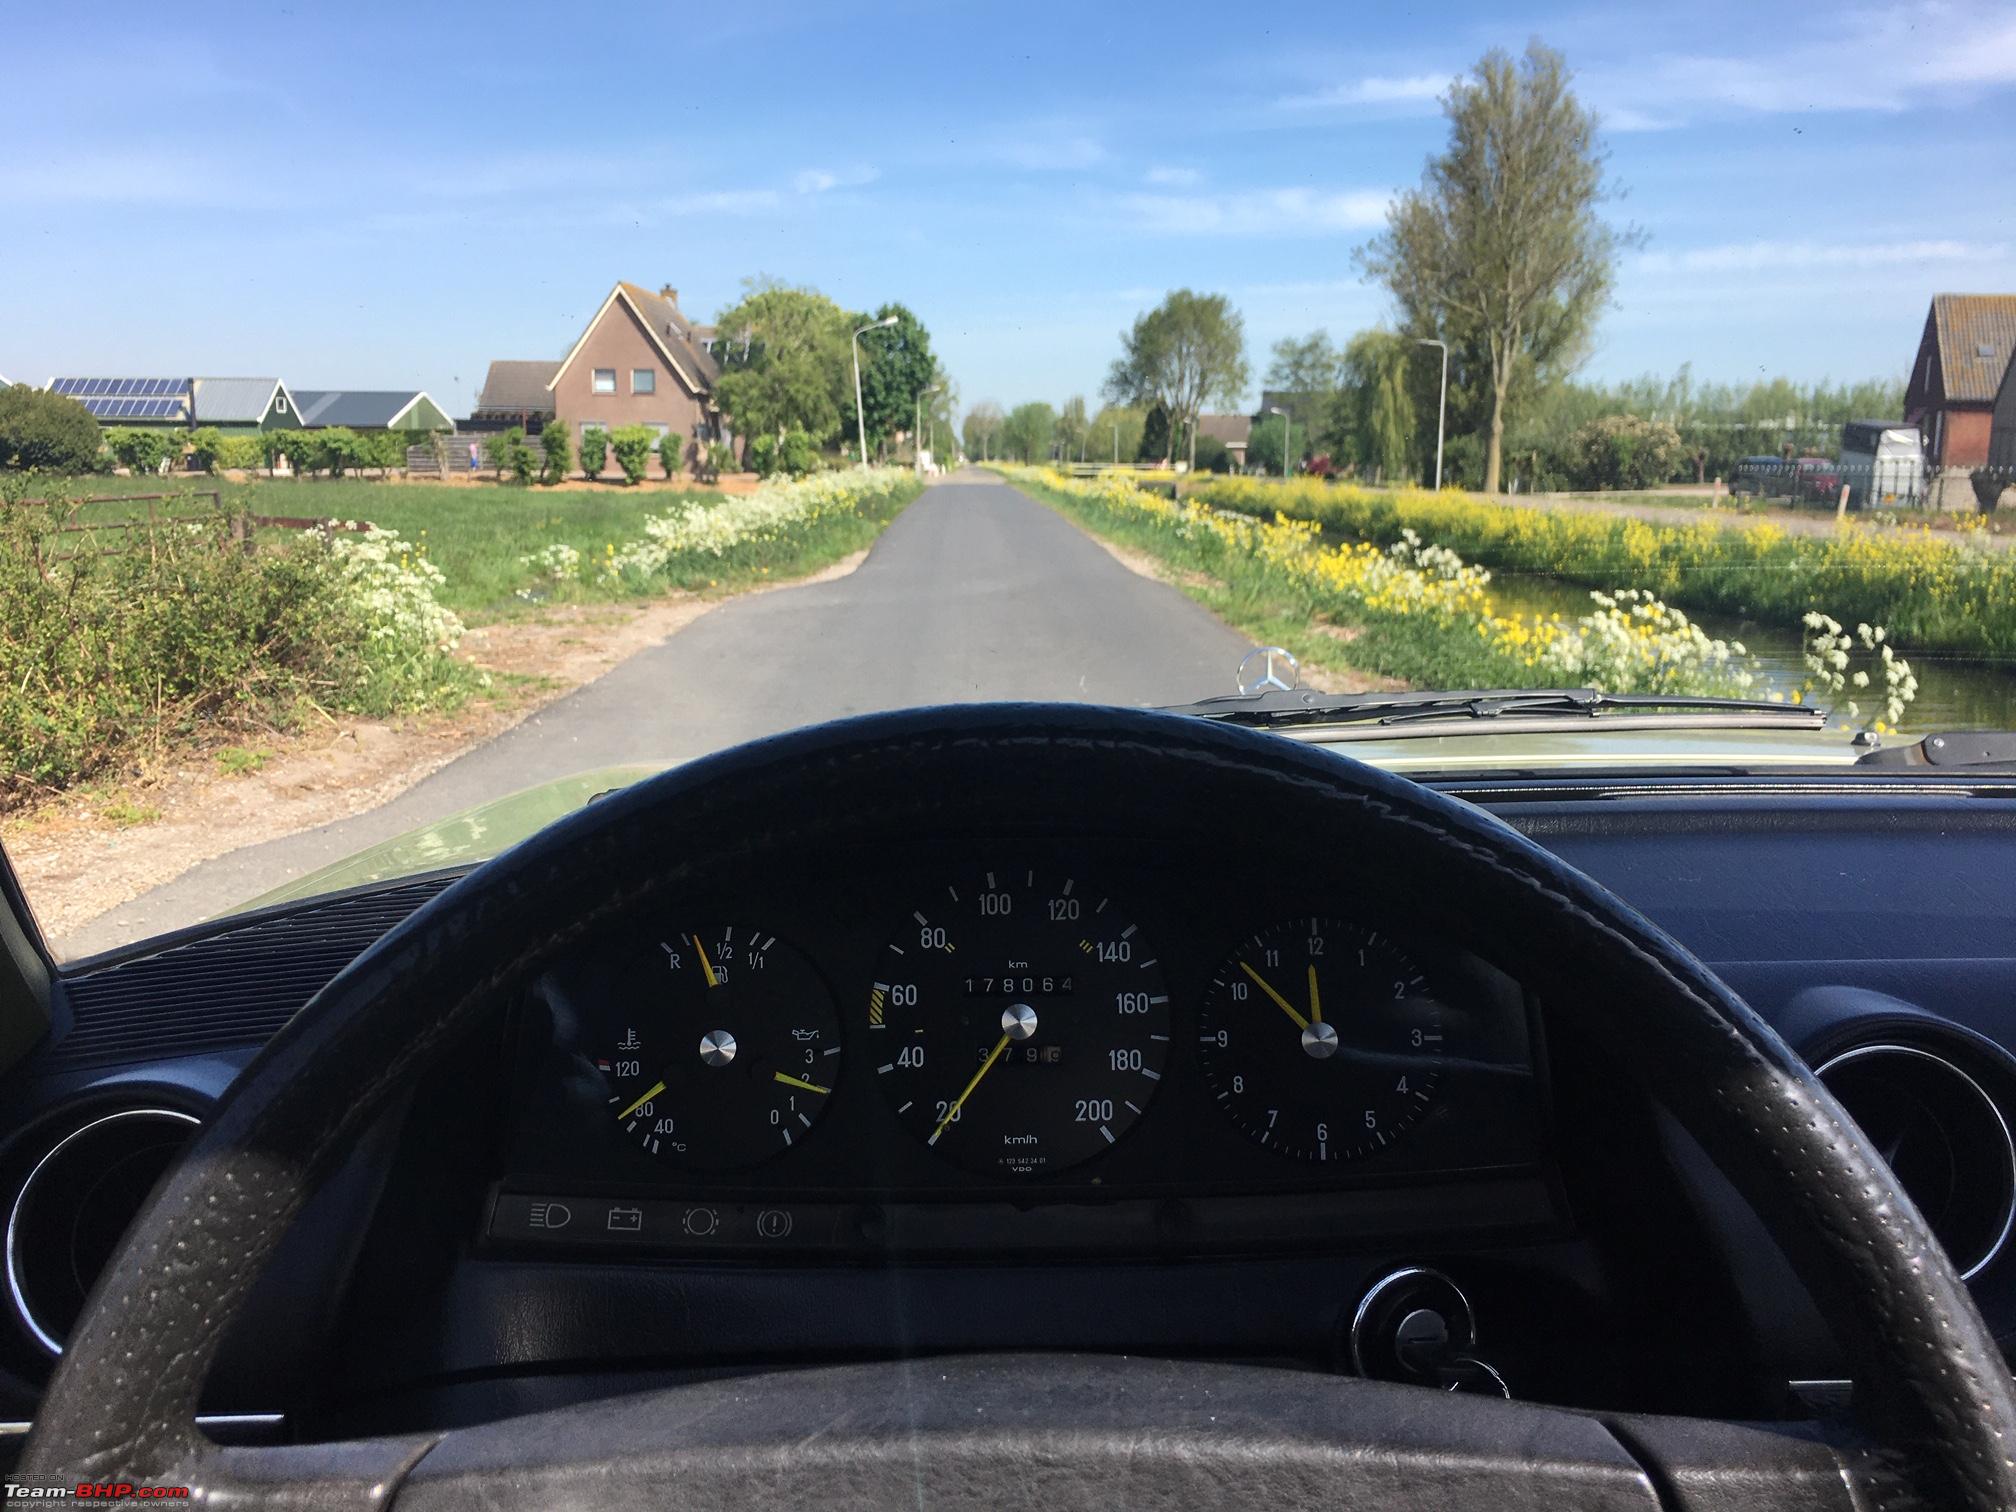 On the way home I picked up some stuff at our local car parts store. An oil filter for the Jaguar, some cooling liquid, a little demurring tool and two sets of microfibre swipes. I will give one set to my daughter and son in law to use on their very first little car. 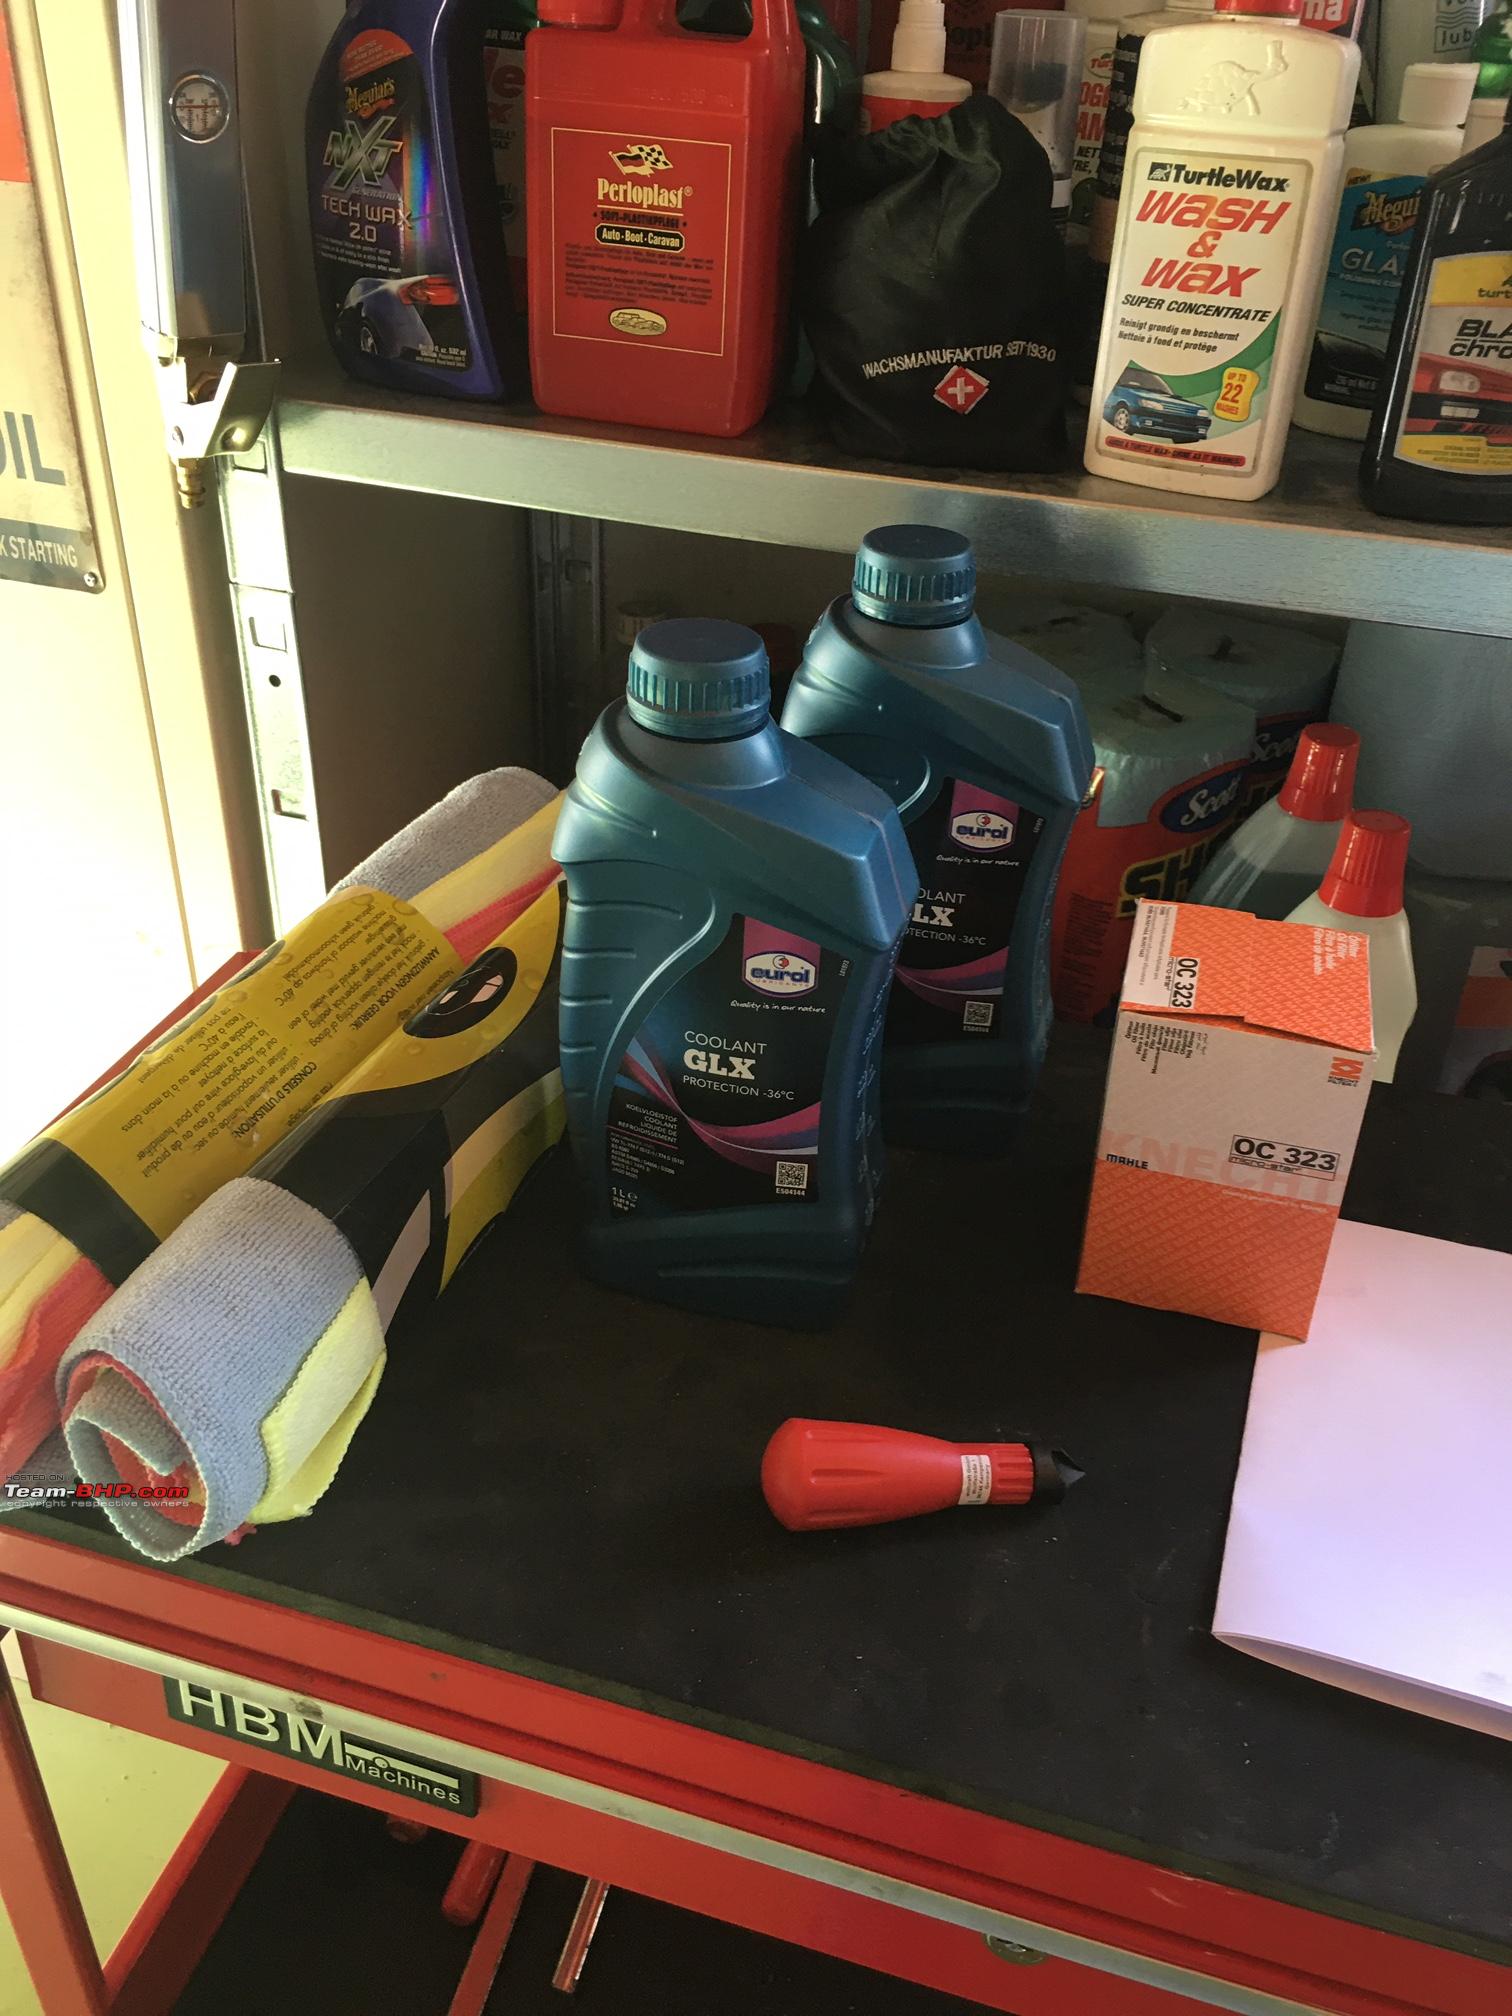 Over the last few days I have been making a list of jobs on my cars. And one job is to give the Jaguar a regular service. I will be ordering the fuel and other stuff on line, but I support my local stores as much as I can so I bought the oil filter there. Also, last night when doing a few checks on the Jaguar I noticed the cooling liquid being very low! Which is a bit of a concern. I havent noticed any leaks or smells. Even so, I will be watching this a bit more careful. So I bought some cooling liquid, G12 pink colour. Never mix different colour cooling liquid. The Spider and the Jaguar have G12 pink and the W123 has G11 blue!.   The Spider seems to be using a lot of oil as well, so I will need to double check that too. It never stops, endless little and big jobs. Lucky me! Jeroen Last edited by ajmat : 24th April 2020 at 18:56. Reason: alignment spell correction |

|  (7)
Thanks (7)
Thanks
|
| The following 7 BHPians Thank Jeroen for this useful post: | ashis89, blackwasp, digitalnirvana, R2D2, Researcher, rrsteer, VivekCherian |
| |
|
24th April 2020, 17:57
| #557 |
| Distinguished - BHPian Join Date: Jun 2007 Location: Chennai
Posts: 11,458
Thanked: 30,107 Times
| Re: My Car Hobby: A lot of fiddling, and some driving too! Jaguar XJR, Mercedes W123 & Alfa Romeo Sp /demurring/s/m/b/ right?  |
|
| (1)
Thanks
|
| The following BHPian Thanks Thad E Ginathom for this useful post: | Jeroen |
|
24th April 2020, 20:14
| #558 | |
| Distinguished - BHPian | Re: My Car Hobby: A lot of fiddling, and some driving too! Jaguar XJR, Mercedes W123 & Alfa Romeo Sp Quote:
Jeroen | |
|
| (1)
Thanks
|

| The following BHPian Thanks Jeroen for this useful post: | Thad E Ginathom |
|
25th April 2020, 17:39
| #559 |
| Distinguished - BHPian Join Date: Jun 2007 Location: Chennai
Posts: 11,458
Thanked: 30,107 Times
| Re: My Car Hobby: A lot of fiddling, and some driving too! Jaguar XJR, Mercedes W123 & Alfa Romeo Sp Well, I had forgotten and relearnt the different words demur and demure! So I learnt something |
|
| (1)
Thanks
|
| The following BHPian Thanks Thad E Ginathom for this useful post: | Jeroen |
|
25th April 2020, 20:57
| #560 | |
| Distinguished - BHPian | Re: My Car Hobby: A lot of fiddling, and some driving too! Jaguar XJR, Mercedes W123 & Alfa Romeo Sp Quote:
| |
|
| (1)
Thanks
|
| The following BHPian Thanks Jeroen for this useful post: | Thad E Ginathom |
|
26th April 2020, 10:19
| #561 |
| Distinguished - BHPian | Re: My Car Hobby: A lot of fiddling, and some driving too! Jaguar XJR, Mercedes W123 & Alfa Romeo Sp Yesterday I finished my first lathe project in steel; the tap follower. With the newly arrived round bar, things certainly improved. I bought amongst other 10 mm and the next part I had to make was 9mm. So that goes quickly. First thing, making sure the cutting bit is absolutely dead centre aligned.  I have taken an old set of feelers and use these to adjust the cutting height. Works a treat!  I decided to cut the tapered point first and then work on the diameter.   The finished part. I am definitely getting a better finish than on the first part!  Most importantly, it fitted very well!  But still a few more things to do before final assembly. Next was the job of milling a flat bit. Out comes my trusted mini mill. I am using two old drill bits as support and to ensure the part is properly aligned,   Voila! 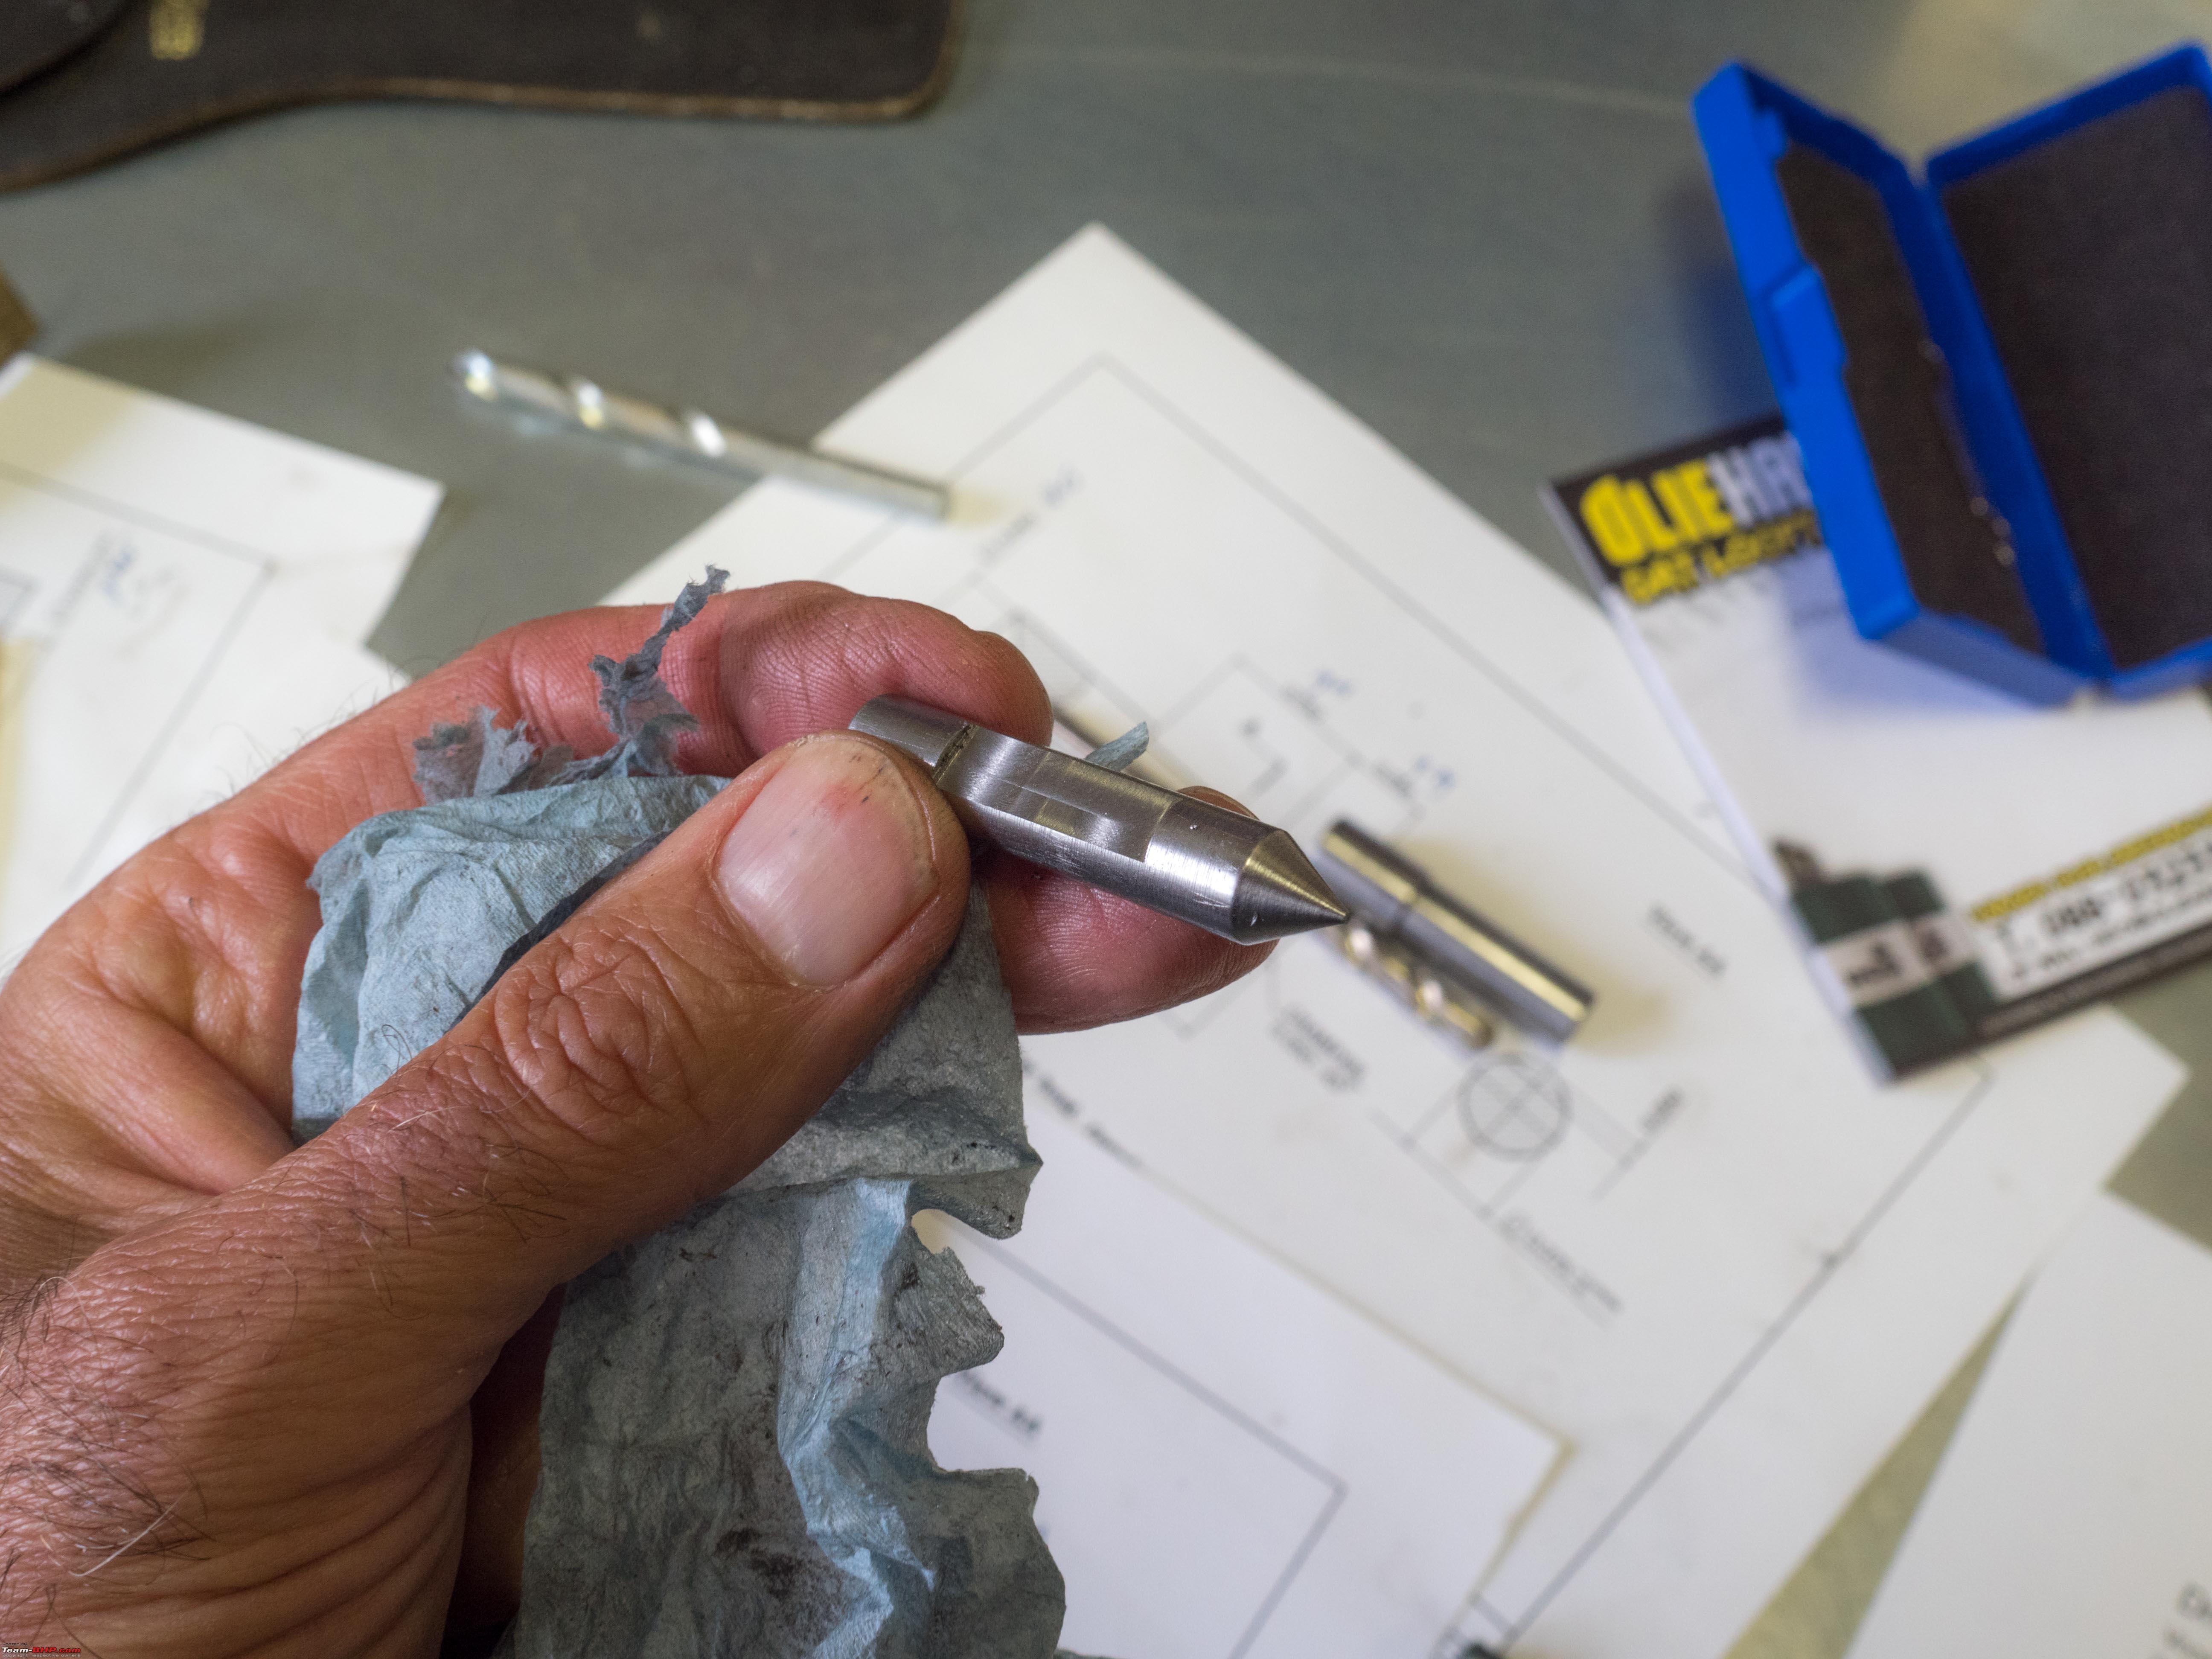 The final trick was to drill a hole in the housing and thread it. This will allow an M4 bolt to hold the two parts together. Based on the earlier conversions a made, this should have been a M4. But when I started looking for what diameter to drill I realised there was a problem. 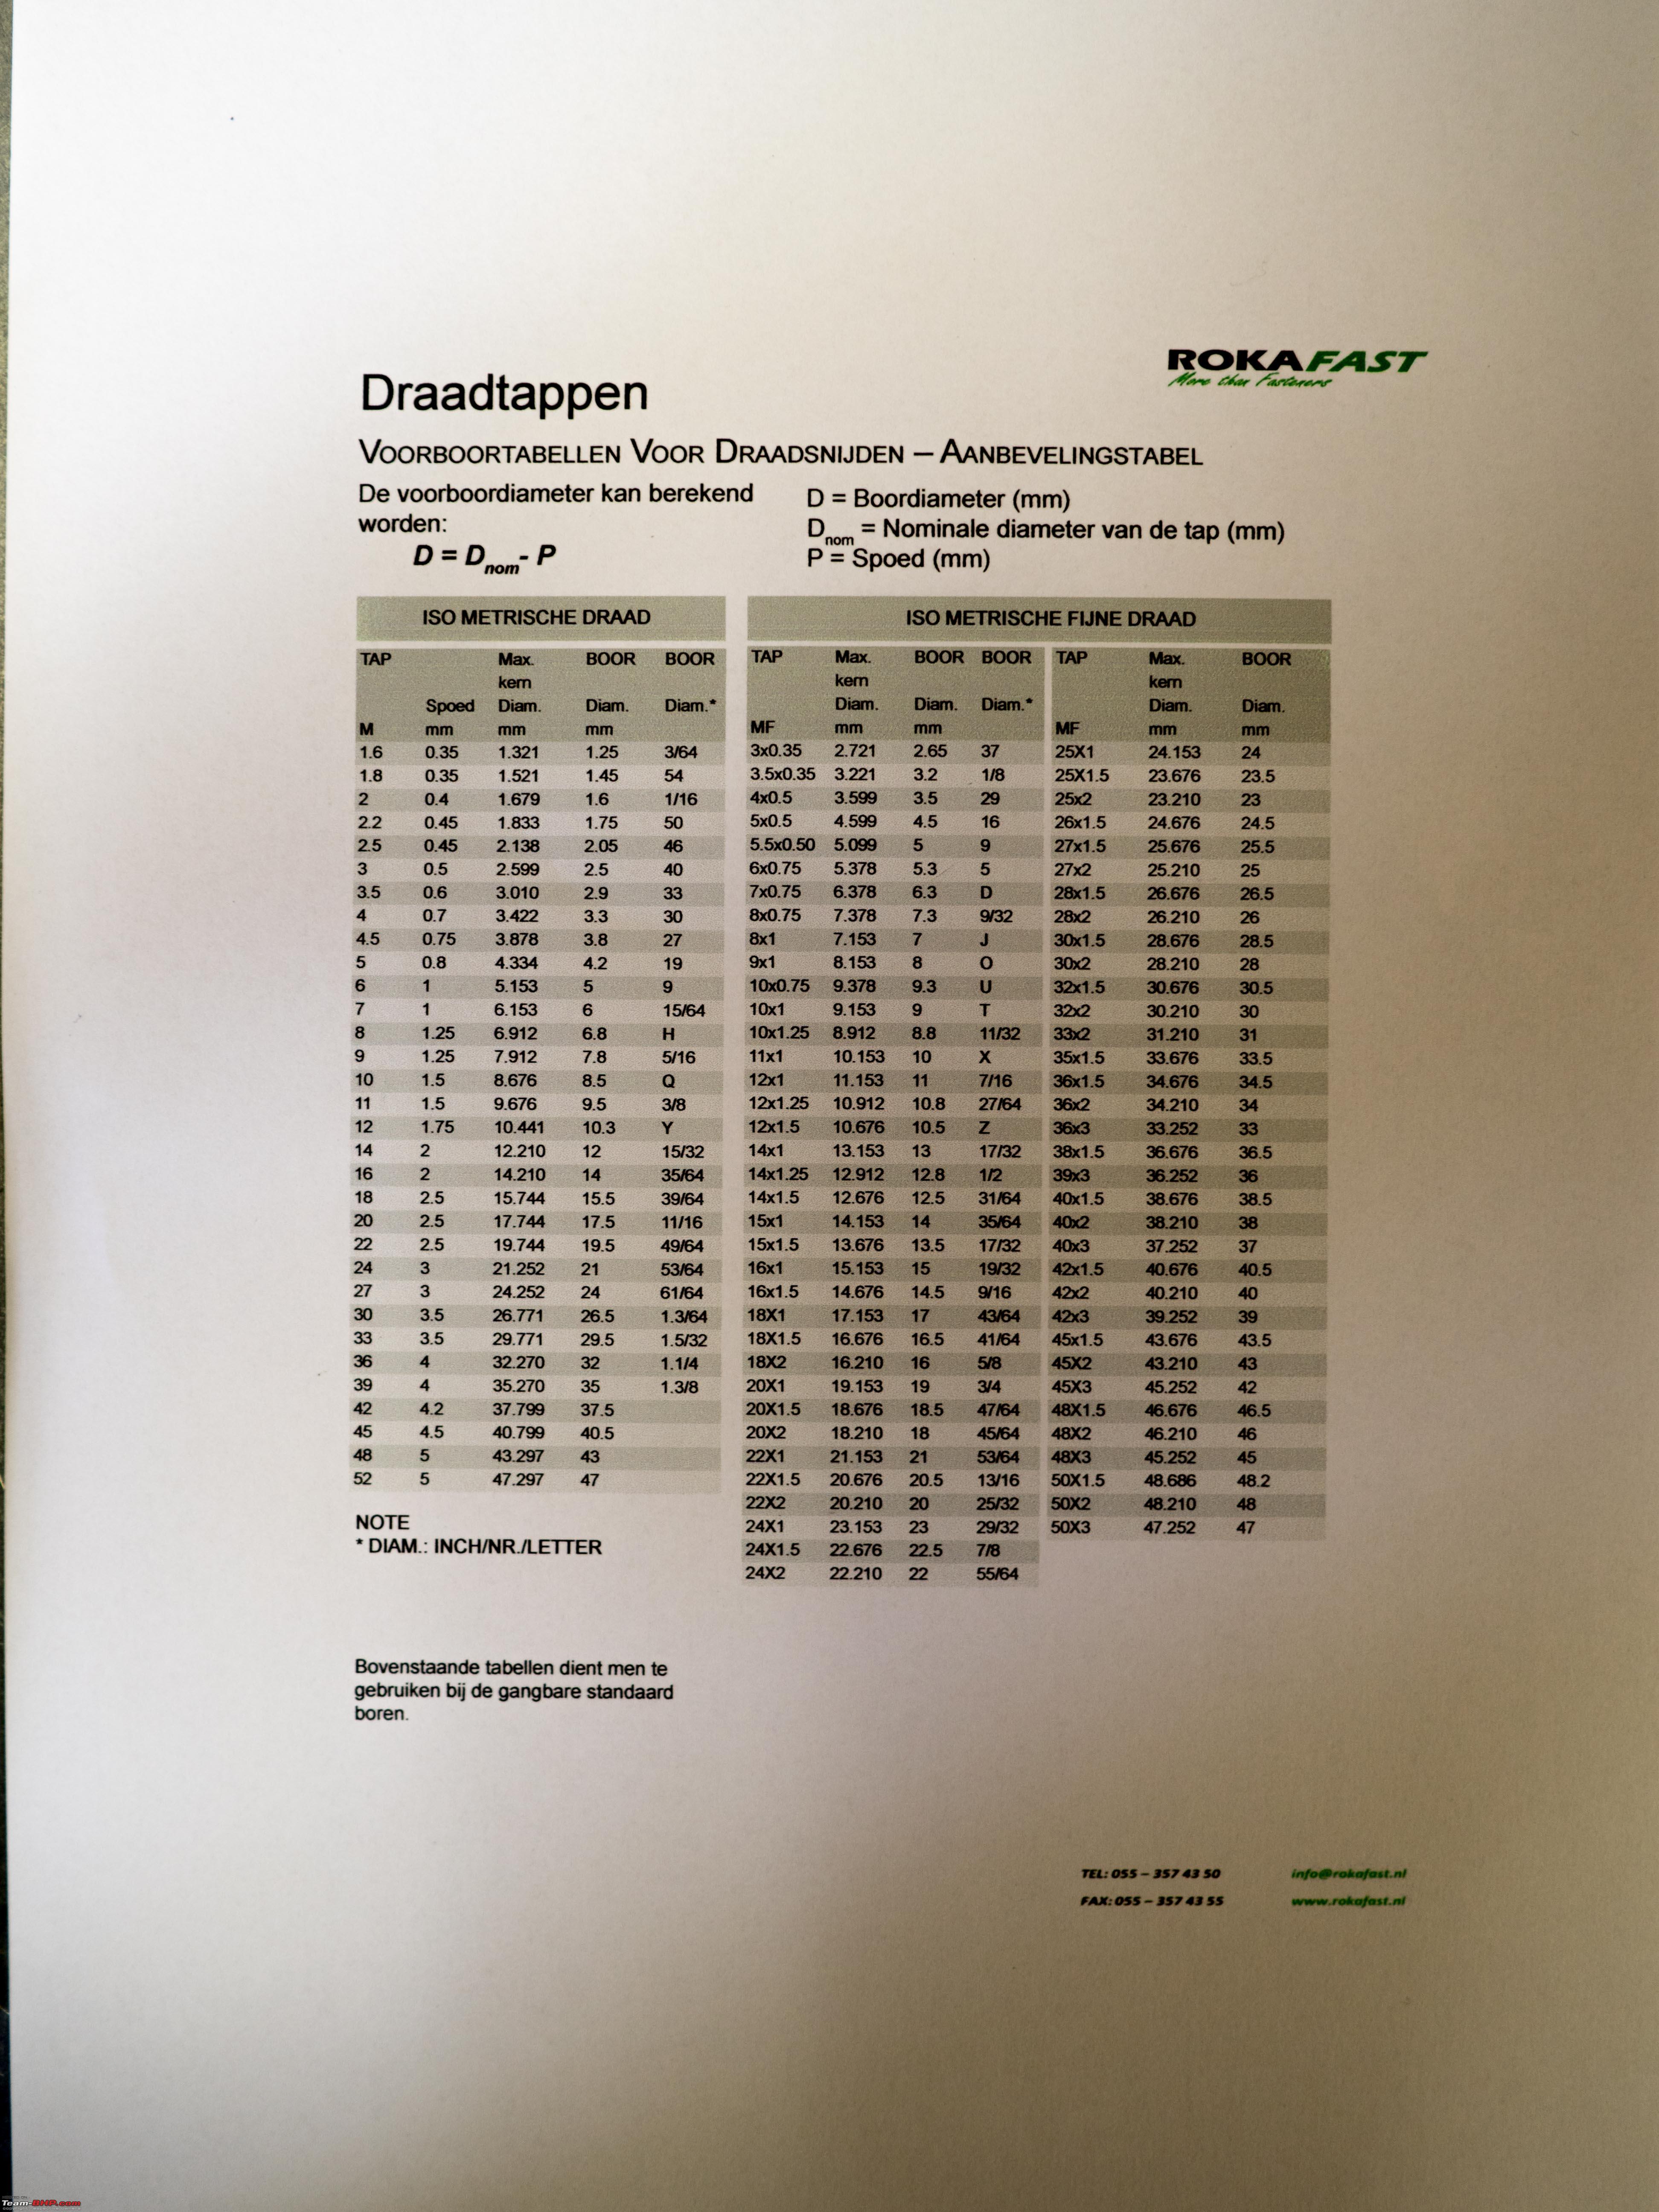 I have limited drill bits. At best whole and half millimeter diameters sizes. M4 would have needed a 3.3 mm drill bit. So I decided to up the specifications and make it a M6 bolt, which meant drilling a proper 5 mm hole. I have a 5 mm drill bit obviously!    Out comes my set of taps and dies. All metric, regular and fine.   Found a M6 bolt and cut it to the appropriate length. Finally all the parts are ready for assembly:   The assembled product  I used a bit of locktite on the bolt. When I first received the spring I thought it would be way to weak. But it is actually fine. It gives a good firm “following” action! I have put a bit of oil on the inside and the outside. For ultra smooth action and to stop it rusting.  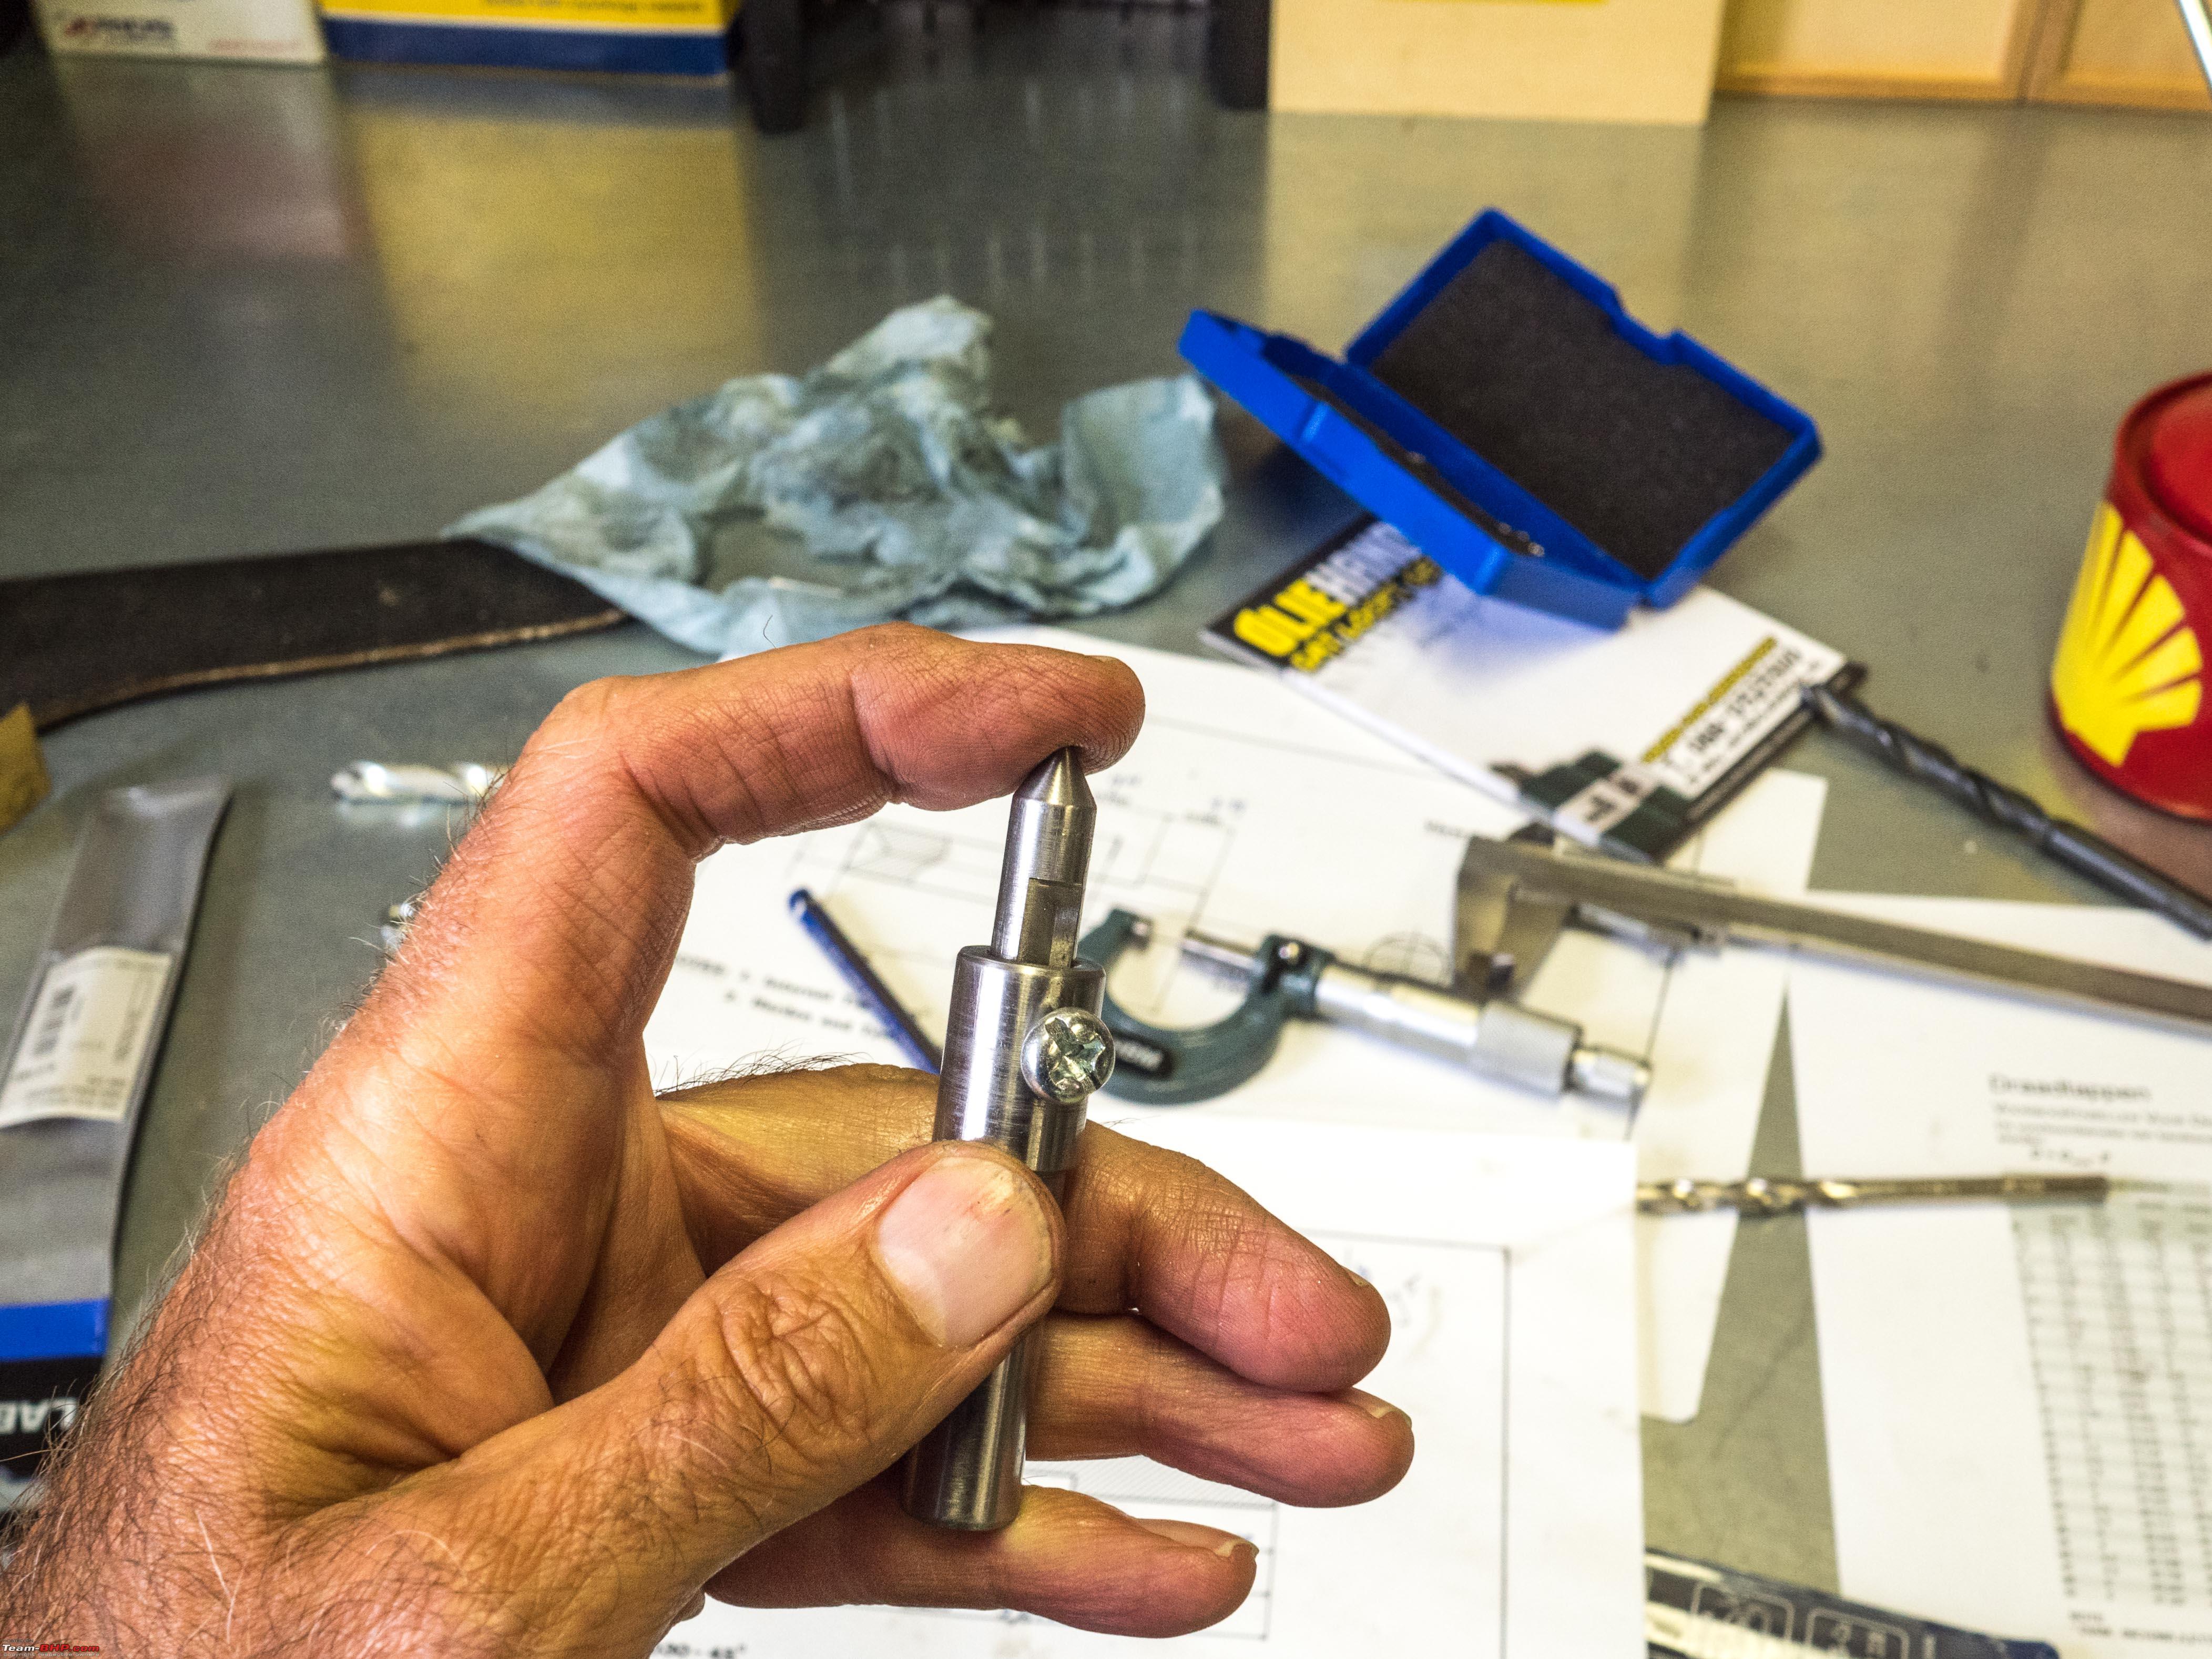 In the video Toly also heat treat the pointy bit. I am nog going to bother with that. I am not sure what kind of steel I have, so no idea what temperatures / times to use. Also, I don’t envisage heavy usage of this little tool either, so I don’t think I will be wearing it down any time soon. Most importantly, heat treating it would have meant using one of my wife’s ovens. That is fine when she is away visiting her mom in Barbados, but not during a lock down where she is very likely to find out, whilst I am doing it! By no means my first project is perfect. But even with just these two simple parts I feel a lot more confident in my little lathe and myself. Still lots to (re) learn, but I enjoyed it immensely. And these finished parts look and feel so nice, very satisfying to produce such simple shapes with your own hands! Next project? I don’t know yet, I might go for a “die-follower”. Easy to do and I probably have everything in house to produce one. Jeroen Last edited by Jeroen : 26th April 2020 at 10:37. |
|
| (8)
Thanks
|
| The following 8 BHPians Thank Jeroen for this useful post: | digitalnirvana, Leoshashi, R2D2, Researcher, rrsteer, Thad E Ginathom, VivekCherian, wbd8779 |
|
26th April 2020, 20:29
| #562 |
| Distinguished - BHPian Join Date: Jun 2007 Location: Chennai
Posts: 11,458
Thanked: 30,107 Times
| Re: My Car Hobby: A lot of fiddling, and some driving too! Jaguar XJR, Mercedes W123 & Alfa Romeo Sp Very nice! Looking forward to the next machining project whatever it might be  I think... I would go for the hardening and tempering. Simple approach, no ovens, timing or any such thing. I'm guessing you have a torch that would heat that part to dull red heat? Do that, and quench in water. Clean it all up with emery, take the torch again, and heat very gently until you get some sort of straw colour at the tip. The only difficult thing there is being gentle enough with the tempering heat: those colours can go through the range to blue dead quick. That is the entire extent of my knowledge and experience of hardening/tempering steel. Sutripta might pop by to tell me what I got wrong (like maybe it should be annealed before hardening?). Oh... there's case hardening. I remember that from school. Even easier, and the surface-only hardness would probably be just fine for that application. But you'd have to have the powder. |
|
| ()
Thanks
|
|
26th April 2020, 21:08
| #563 |
| Senior - BHPian Join Date: Jul 2009 Location: Calcutta
Posts: 4,665
Thanked: 6,233 Times
| Re: My Car Hobby: A lot of fiddling, and some driving too! Jaguar XJR, Mercedes W123 & Alfa Romeo Sp ^^^ Not all steels are hardenable. And there are too many variants - air, water, salt, cyanide  , ... , ...And for Jeroen's use I don't think hardening is necessary. For small parts which need hardening, use silver steel dowels. Simple to harden. Interesting is the 5 mm drill bit used. By the looks of it, it is a centre drill. Used for lathe work, prior to turning. Wonder how it landed up in Jeroen's toolchest. Regards Sutripta |
|
| (2)
Thanks
|
| The following 2 BHPians Thank Sutripta for this useful post: | digitalnirvana, Thad E Ginathom |
|
27th April 2020, 04:40
| #564 | |
| Distinguished - BHPian Join Date: Jun 2007 Location: Chennai
Posts: 11,458
Thanked: 30,107 Times
| Re: My Car Hobby: A lot of fiddling, and some driving too! Jaguar XJR, Mercedes W123 & Alfa Romeo Sp Quote:
Actually, I have drilled a lot of holes. This brought me into the vicinity of machinists, although my job was not classed as skilled. The boss would let me sharpen the bits, although for an important job, he would then do it properly. I did learn how, though I would not claim the skill now. Sometimes they let me go and watch an automatic capstan lathe [???] for a change. These must have been the forebears of today's CNC: they had some kind of plug-board programming and ran a number of operations repetitively with a bar feeder. Gosh, that would have been about 1972. Last edited by Thad E Ginathom : 27th April 2020 at 04:51. | |
|
| ()
Thanks
|
|
27th April 2020, 13:16
| #565 | |||
| Distinguished - BHPian | Re: My Car Hobby: A lot of fiddling, and some driving too! Jaguar XJR, Mercedes W123 & Alfa Romeo Sp Quote:
Quote:
It is a centre drill (or at least that is the word I am using). Or spot drill perhaps? any way it is a drill bit that is very very sturdy and also cuts differently from your regular bits. It wont walk away so these are used to drill the initial hole. Next you use a regular twist drill. I also use these centre/spot drill to make the hole for the dead centre. Quote:
I have already done a third little project on my lathe yesterday afternoon. I was mowing the grass. I have a Bosch electric mower. I had noticed it wasnt cutting very well and it was also sounding a bit strained. Time to investigate. The blade was bend and very dull on both ends!   So I took of the blade, banged it with a hammer a bit and grinded a sort of cutting edge to it.   But the blade definitely did not turn the way it should. I could feel a lot of resistance. So I took the whole thing apart. So far, when working on Bosch appliances, I have found you can usually take them apart quite easily. 7 screws keep all of this together!   The bearing was completely shot! It had also been running hot and it had melted a spacer!   Luckily the number on the bearing was still visible, (6002-2Z). So I quickly ordered two of them. Should arrive in a couple of days. Next, the spacer. Decided to fabricate a new one, on my lathe of course!!  Using the centre/spot drill again!  Next I had to drill a hole. The largest drill bit I have is only 12 mm. And that is really not big enough so I can get my cutting bits into it properly.   I sort of managed in the end. The last action was to cut of the spacer to the exact thickness. But then my luck ran out. I know this is the relative heavy bit of cutting, but it had been going really well and smooth so far. On the very first very gentle cut the bit duck in, the chuck lost its grip, mayhem in the workshop!!! That is when I also noticed I was still wearing my rings, bracelet, watch. It could have been a whole lot worse. So I took the hacksaw to it and my mini mill to the rescue:  You will notice I am getting very creative in finding and using various parts to fix and align my pieces into the vice! Anyway, the new spacer still looks good and is spot on when it comes to its dimensions!  I have got a nice bit of stock of various pieces to work on. More to come  Jeroen | |||
|
| (9)
Thanks
|
| The following 9 BHPians Thank Jeroen for this useful post: | digitalnirvana, jayakumarkp, Leoshashi, R2D2, Researcher, Thad E Ginathom, vaasu, VivekCherian, wbd8779 |
|
27th April 2020, 18:51
| #566 | |
| Senior - BHPian Join Date: Jul 2009 Location: Calcutta
Posts: 4,665
Thanked: 6,233 Times
| Re: My Car Hobby: A lot of fiddling, and some driving too! Jaguar XJR, Mercedes W123 & Alfa Romeo Sp Quote:
Polymers really can't be machined the way one can machine metals. Amongst other things, these don't 'chip' off - these deform and melt and bind. Another thing to keep in mind is that polymers have extremely high coefficient of thermal expansion. Maintaining accurate dimensions is a problem. Be very careful with brass too. Regards Sutripta | |
|
| (3)
Thanks
|
| The following 3 BHPians Thank Sutripta for this useful post: | digitalnirvana, Jeroen, Thad E Ginathom |
| |
|
1st May 2020, 17:24
| #567 |
| Distinguished - BHPian | Re: My Car Hobby: A lot of fiddling, and some driving too! Jaguar XJR, Mercedes W123 & Alfa Romeo Sp I am getting ready to give the Jaguar a regular service, oil, oil filter, air filter, check the brakes/rotors etc. And I will also flush the brake fluid. It has been well over 2 years since last refresh. I was browsing through my Jaguar workshop manual. I was surprised to see this sequence for the brake bleeding  I have always followed the rule to start with the longest braking line and work your way down. On modern cars it can be a bit tricky working out which one is the longest. It is not as straightforward as some might think. This little video explains it well But I am very puzzled with this Jaguar sequence. Both the master brake cilinder as well as the ABS unit are mounted on the left side. If anything, as far as I can tell, Jaguar goes from shortest to longest brake line. I wonder why? Jeroen |
|
| (1)
Thanks
|
| The following BHPian Thanks Jeroen for this useful post: | R2D2 |
|
3rd May 2020, 08:45
| #568 |
| Distinguished - BHPian | Re: My Car Hobby: A lot of fiddling, and some driving too! Jaguar XJR, Mercedes W123 & Alfa Romeo Sp Yesterday, Saturday, was another day of a lot of fiddling! But first I had to cut the hedges in our garden en my wife had another fiddling job for me. Our extractor fan in the kitchen has been playing up. When on the hight speed setting it sometime cuts out. When we moved into this house end of 2017 the extractor fan had some problem too. It made a lot of noise and the whole casing was vibrating. I took it apart then, basically to find it was unbelievable dirty and greasy. It took me many hours of cleaning, but once it was clean it ran fine again. So I was suspecting something similar again. So out it comes: I remembered how I had done it last time. Its big and heavy, but with a carton box underneath it goes quite smoothly.   It was clear that this time it was not the dirt or grease that was the problem. The fan ran very smooth, although I did spot some grease collecting between the fan blades. So my money was on the electronics. This thing has a very simple electronic speed control. Opened it up. It looks like one of the capacitors has started leaking. So I will need to replace it.   I phoned around, but nobody anywhere near us, could help, nobody knew of an electronic part store. There are very few of these places around these days. We used to have a very good one, close to our old home. So I will have to find it online somehow. As I had the whole fan assembly out anyway, I decided to take it apart further, just to give it a thorough clean.    I put the fan into my special degreaser tank and that worked perfect. I did not have this last time. It was also a lot cleaner than last time, took all but five minutes to get the last bit of dirt, grease, chunk washed away 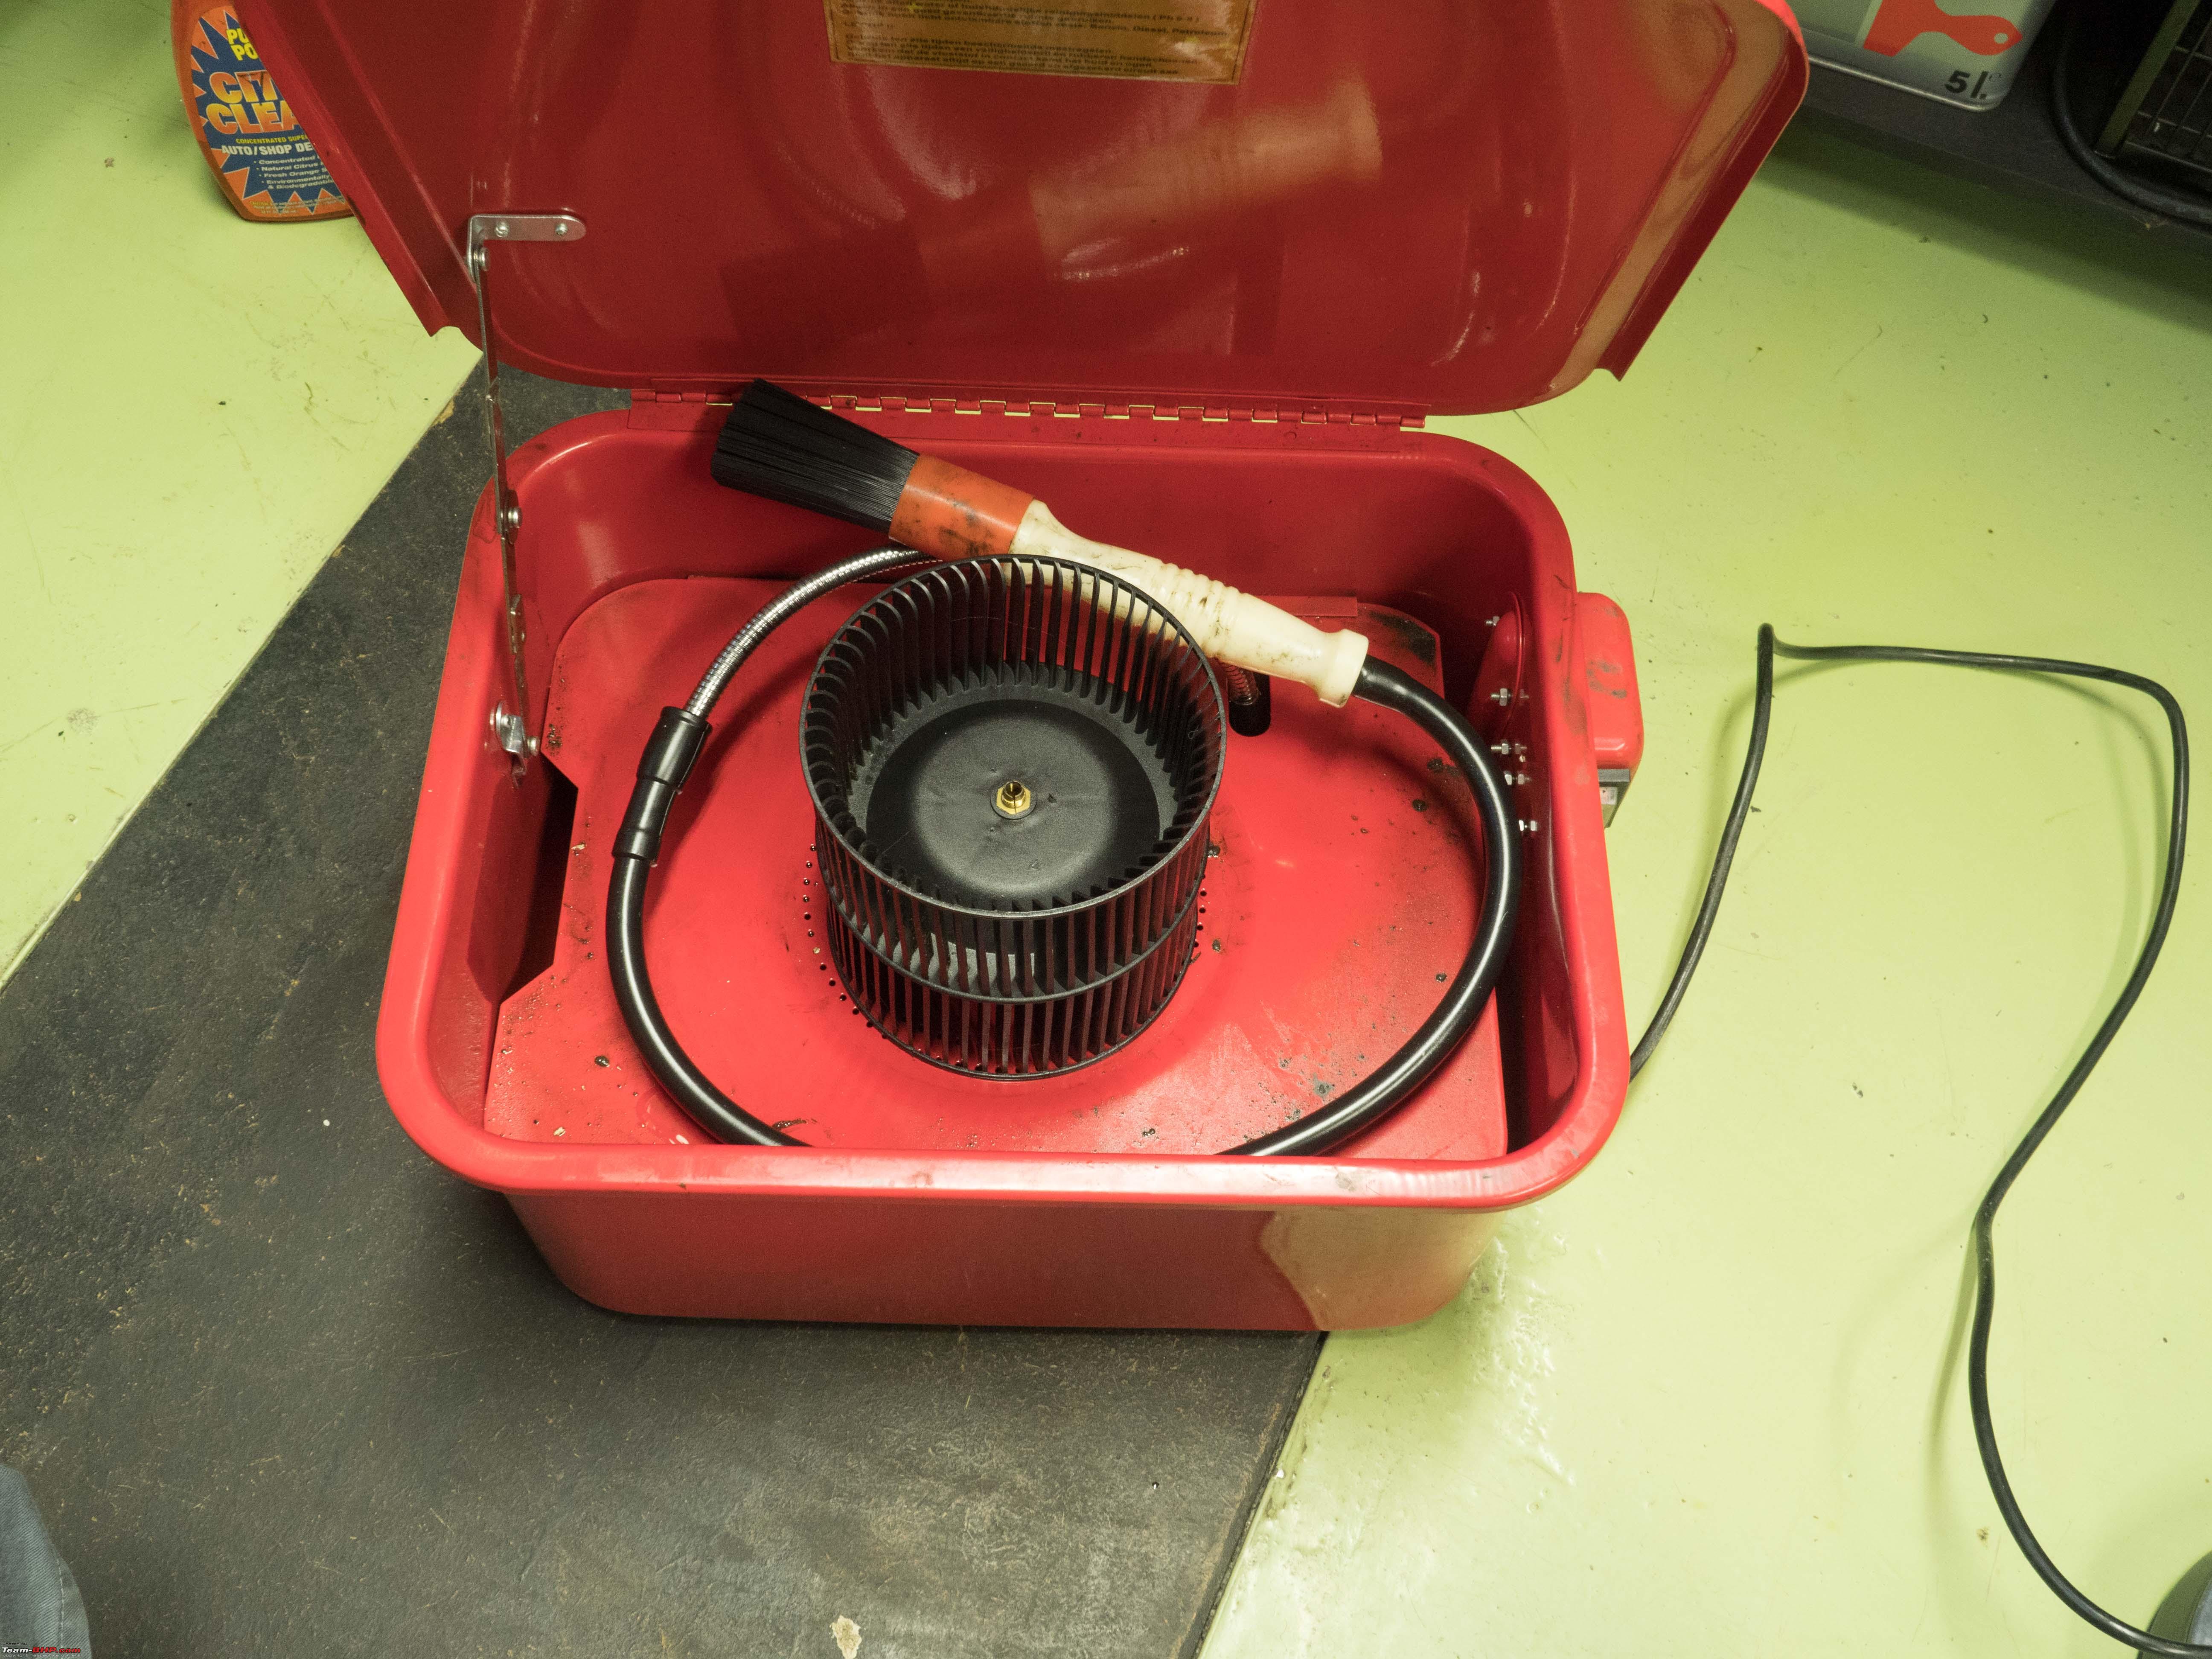 Next, servicing the Jaguar.  According to the maintenance schedule the following was due - engine oil and oil filter change - inlet air filter cleaning and recharge - brake fluid flush - check all brake components for wear  I decided to start with the air filter. This is a K&N filter. You need to clean it and recharge it. That takes quite a bit of time to do properly. It was quite dirty!  On these K&N filters you soak them with special cleaning fluid. Takes about twenty minutes. Then just rinse them out under a running tap. Next dry them naturally. I always help nature a bit by blowing some air through it. Carefully, as I dont want to damage the filter.  Once it is all dry you apply the special (red) oil to the filter (dirty air side only). That needs to soak in some twenty minutes.  All in all, cleaning and recharging a K&N filter takes several hours. Not because of the amount of work, but because of the waiting times, soaking, drying etc. So that is why I start on it and keep coming back to it as I do the other jobs at the same time. I was also very pleased that my repair on the air inlet filter housing is still holding well. I had problems with one of the clamps that had snapped off. And it was difficult to glue it back on. I reported on this quite some time ago, but whatever glue I used, it is still holding. Next checking the brake components and flush the brake fluid. I was going to do this wheel by wheel in the sequence as per the Jaguar manual. I have posted some question on two Jaguar forums. Nobody has come up with the answer why the Jaguar bleeding sequence is the exact opposite from what is considered the usual way. Getting access to the brake components is easy. Jack up the car, add an axle stand for safety, take of the wheel! Thats it!  Here a bit of an overview.  Measuring the thickness of the discs can be a bit of a problem. I have a special little tool for it.  It allows you to place it well across any rims on the discs. As the pads wear down the disc, they usually form a bit of an edge/rim on the outer diameter. Which throws your measurement off. Here the correct way to measure:  The Jaguar workshop manual has detailled measurements:  The most relevant measures are the minimum thickness, minimum wall thickness and pad thickness. At the Left Front all was well! Time for bleeding and flushing the brake fluid and in accordance with Jaguars peculiar procedure you start on the Left Front! First thing is to try and empty the brake fluid reservoir as much as you can. I have this huge syringe that works quite well. Make sure to protect everything with rags and so. Brake fluid is very corrosive. If you get it on your paint, wash it down with water and soap quickly! 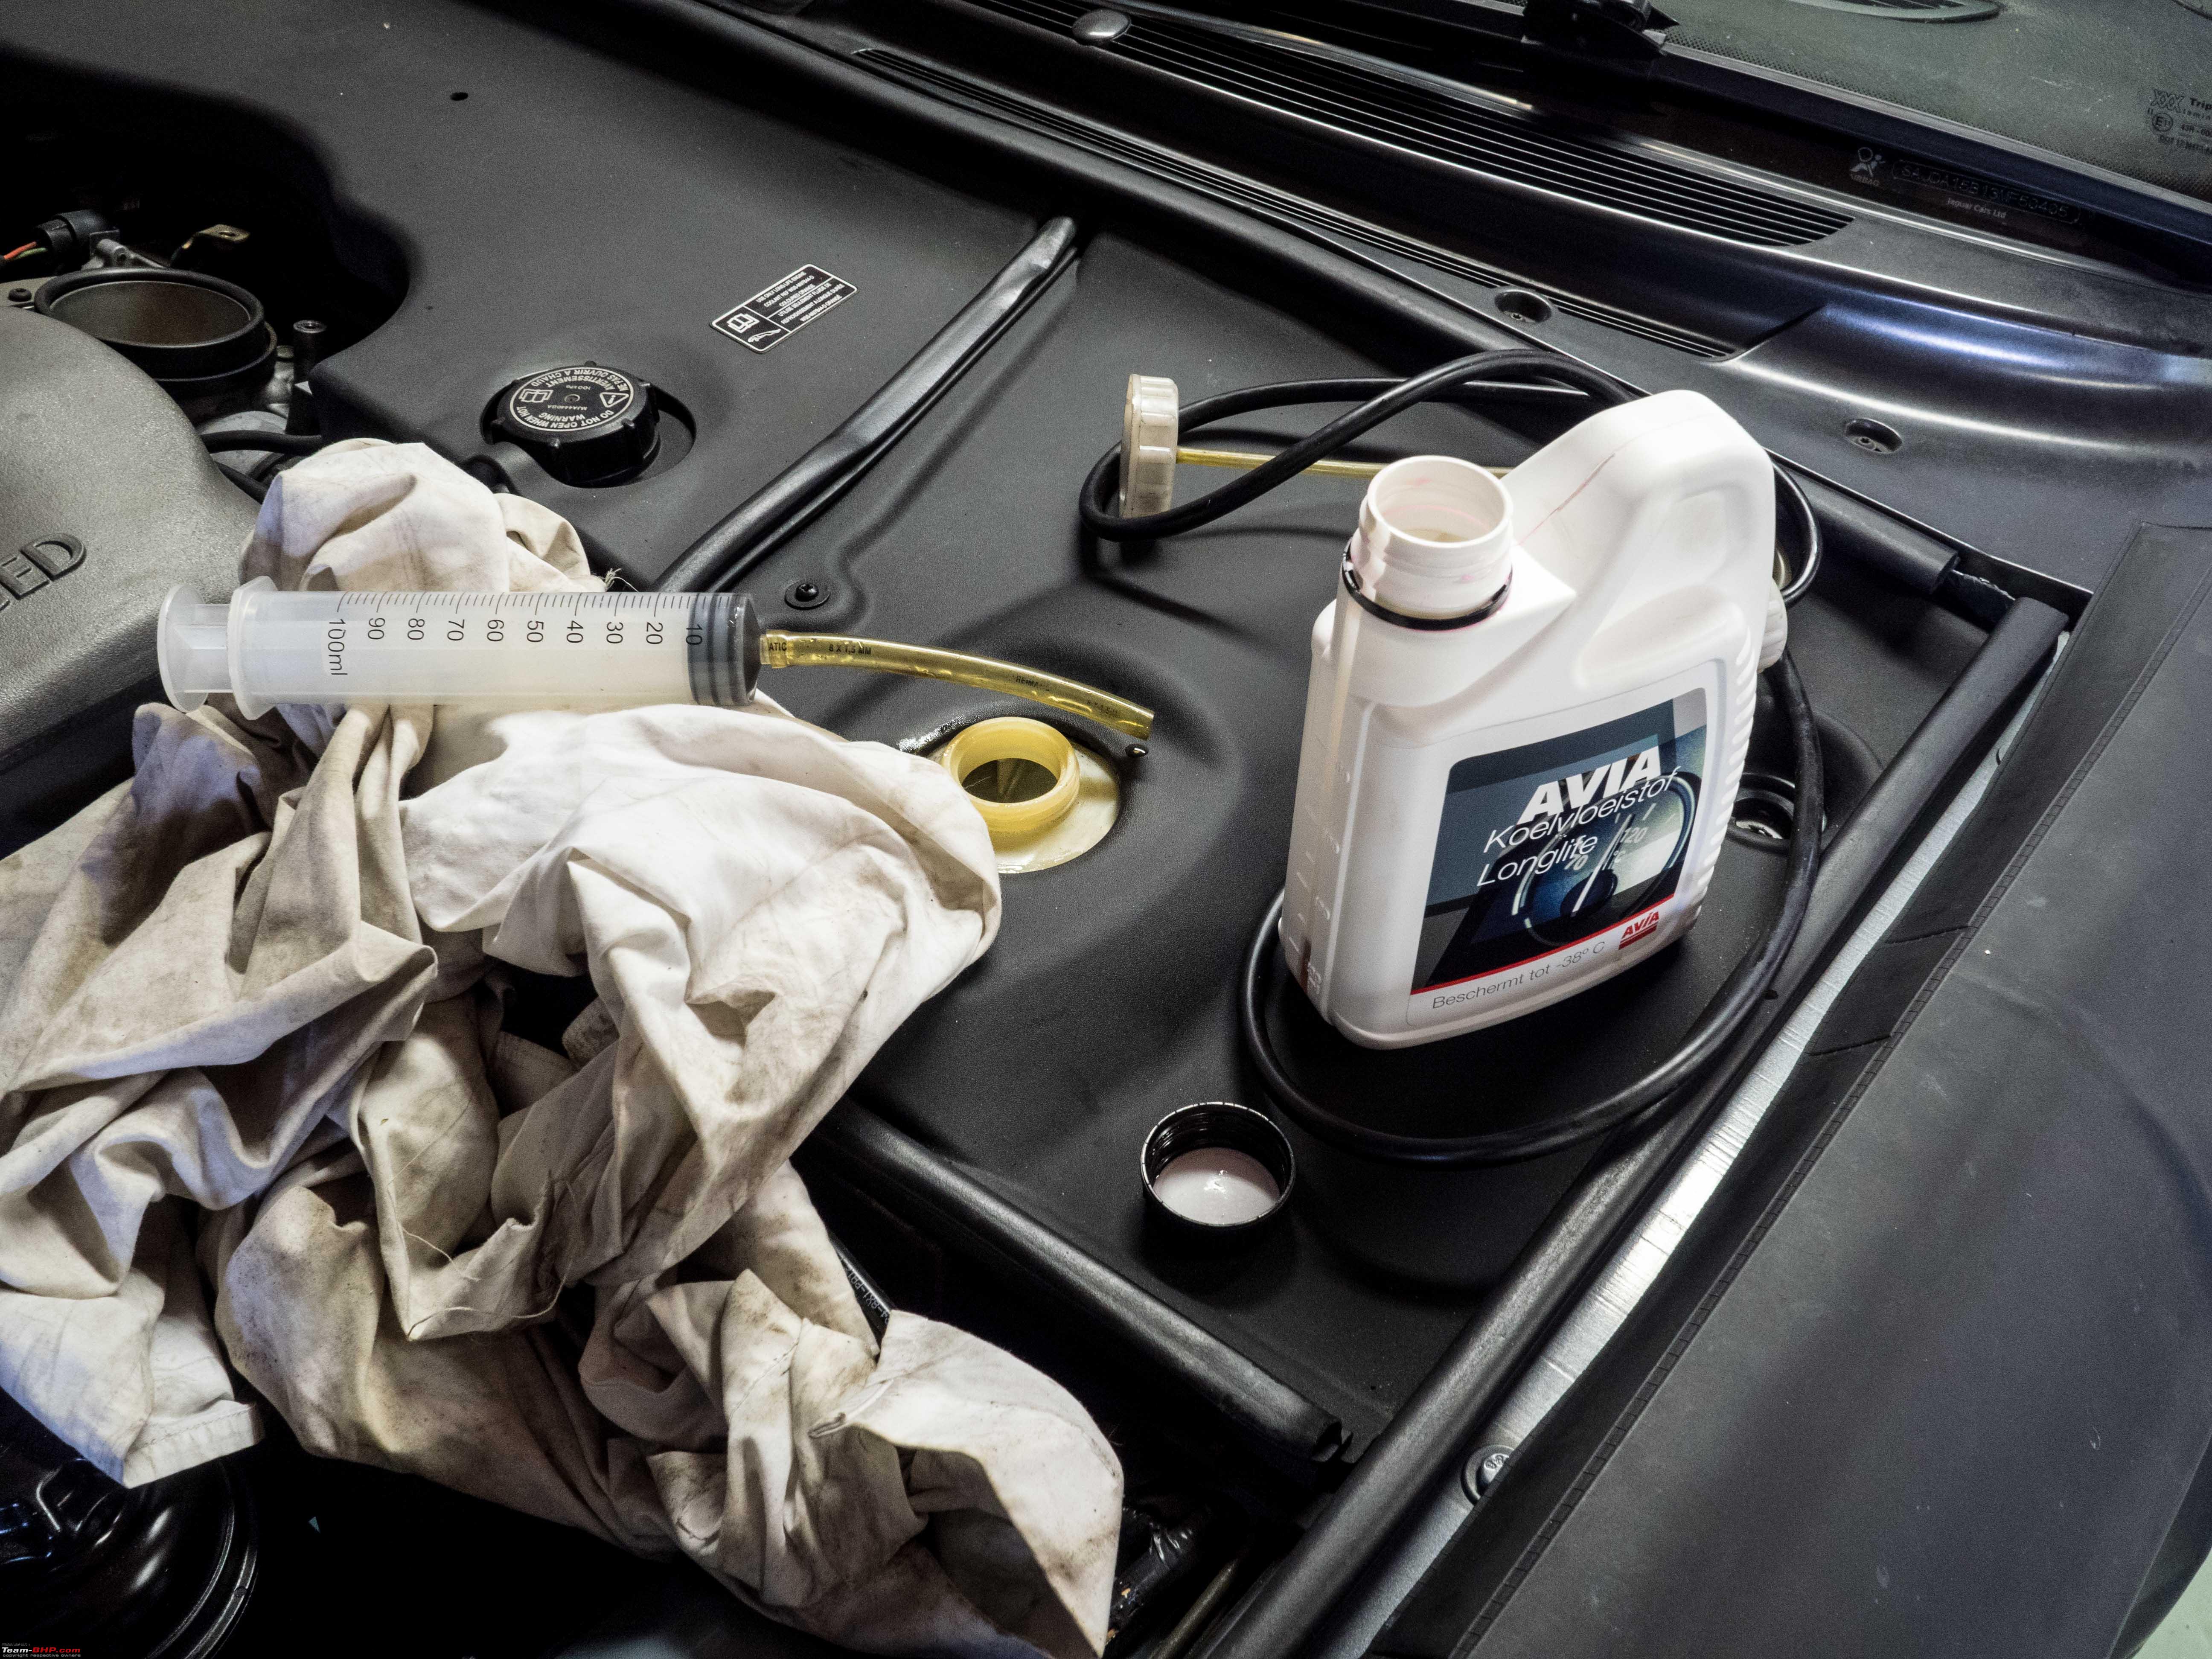 Next I am setting up my Easy Bleed, pressure bleeder. You will have seen me using this before. It uses pressure from the spare wheel. In this case I took the spare wheel from the Mercedes. As that is the easiest to get out. Also, you have to reduce the air pressure. The bleeder is only allowed 1,4 bar whereas I tend to keep my spare tyres around 2,6 bar.  Next, add a little hose to the bleed valve and hold a jar underneath.  I have shown my special little hose with bleed check valve before. Could not find it. But it is not a problem. With the easy bleed pressurised you can concentrate on the brake and bleeding. However, there was a problem. I had noticed the bleed valve was missing its dust cap. And sure enough, it was completely blocked! A little brake oil was pushed out alongside the threads, but no fluid was coming out of the bleed valve itself. So I took the bleed valve out and used my mini mill to drill open the little hole again. There was about 5-6 mm of crud and dust inside!  Note to self: Must get dust cap!  With the bleed valve fixed, the bleeding went fine. Right Front and the rear ones did have their dust caps still on. I always test the brake pedal, after bleeding each brake, just in case.  Both front wheel brakes sets were fine in terms of wear. So I moved to the Left Rear.  Bleeding went fine. But both rear discs need replacing! So I need to look into that and order the parts. At first I thought I might as well stop doing the brake fluid flush. Replacing the discs mean removing the callipers and that could mean having to disconnect the brake lines. So might as well do it when replacing the discs. But I had a close look and I am pretty sure I can remove the callipers without having to undo the brake lines. The flexible hose connects directly to the caliber. On the Spider this was not the case and I had to take the brake lines off, prior to taking the callipers off. With all brakes measurements written down, brake system flushed, and the K&N filter cleaned, dried and recharge and re-installed I took the Jaguar for a quick test ride and also to warm up the engine oil. Put it in my special oil change position. This position allows me to reach the sump drain plug and filter easily and I can get the oil drain canister underneath.   The Jaguar is one of the few cars i have worked on, where the oil sump drain plug does not come with a copper ring. It has a rubber one. The official Jaguar procedure is to replace the whole plug every single oil change. I have only done that once. Which meant having to take out another mortgage as Jaguar charges a ridiculous amount for these drain plugs. So I keep re-using the old one. I put a bit of teflon tape around it too. Always careful with teflon tape on drain plugs. You do not want it ending up in the sump as it is likely to clog up something! I will cut open the old oil filter later. I want to check how dirty it is on the inside. Oil changes are easy jobs and dont take much in terms of tooling!  So all jobs done and a new job, replacing the rear discs, to be investigated. I also need to find that capacitor for the extractor fan. Earlier I managed to get some nice coloured electrical diagrams for the Spider. I got them from a guy I met on an American Alfa Romeo Spider forum. He mailed them to me as PDF file. I mailed them to a little printing shop in the next village. I asked them to print them on A3 paper and laminate them. Came out really well. And I put them up in my garage!   |
|
| (6)
Thanks
|
| The following 6 BHPians Thank Jeroen for this useful post: | digitalnirvana, Leoshashi, R2D2, Thad E Ginathom, VivekCherian, wbd8779 |
|
4th May 2020, 11:21
| #569 |
| Distinguished - BHPian | Re: My Car Hobby: A lot of fiddling, and some driving too! Jaguar XJR, Mercedes W123 & Alfa Romeo Sp I mentioned the Spider appears to be using a lot of oil. As all the leaks have been fixed there are two possible causes. It could be either a problem with the piston rings or the valve seals. I really need somebody knowledgeable to drive behind me. Piston rings tend to show up with dirty smoke coming from the exhaust when accelerating hard. Problems with the valve seals tend to give blue smoke when you come of the throttle. I cant see anything in my mirrors. When push comes to shove I can always do a compression test. But I am a little reluctant. If it is the piston rings, it means another engine out job! The valve seals can be swapped. Most people will take the cilinder head off. But my old friend Rolf knows a trick and does it with the head still on. One thing that I can easily check is the crankcase breather and oil separation system. If that clogs up it usually means more oil leaves the engine via the valve seals too. Here is how the system works / looks like:  It is really simple. A small oil separator. Air (with oil) is drawn into it. the oil is separated from the air and returned to the sump via a tube connecting to the oil dip sticks connection. Clean air is returned into the intake air circuit again. The other thing, my oil separator is badly rusted, so I had been meaning to take it out to fix that too!  Simple job of removing it, Two screws and four hoses/tubes.  It doesnt show that well, but this pipe was more than half full of oil reside.  Cleaned it in my degreaser tank, dried it, sand papered it a bit and then hung it to be sprayed.  I checked all four hoses if they were open. Disconnected everything on both sides. And sure enough the return hose to the sump was completely blocked. Some compressed air might get it unblocked.  It sure popped whatever it was out and left a huge mess on my recently cleaned engine. More to clean!!    I gave the oil separator a three layer spray with my can of Hammerite matt black paint. Love this stuff. All the preparation you need is to clean and sand it down a bit. Nice finish  Everything re-assembled and the Spider is ready to go again.  Very easy job, not too many tools required!  I will be taken it for its bi-annual MOT later today. Maybe Goof has some ideas what else we can check do. Cleaned up the old engine oil from the Jaguar. Poured it into some old containers ready to be taken to the tip for proper disposal.  I also cut open the old Jaguar Oil filter. I want to check what these filter look like for future reference.    I have already investigated on how to replace the rear discs on the Jaguar. Should be straight forward enough. I will need to phone around today to see who can provide a pair at a decent price. Jeroen |
|
| (5)
Thanks
|
| The following 5 BHPians Thank Jeroen for this useful post: | digitalnirvana, Leoshashi, R2D2, Researcher, VivekCherian |
|
4th May 2020, 22:01
| #570 |
| Distinguished - BHPian | Re: My Car Hobby: A lot of fiddling, and some driving too! Jaguar XJR, Mercedes W123 & Alfa Romeo Sp Just came back from the Spider bi-annual MOT at Goos/Goof. Spider passed with flying colours, almost! The brake lights were not working. Which was remarkable, because I had checked them the other day. A wire on the brake light switch on the brake pedal had come loose. This is known as the joy of owning a Classic (Italian) car. Bits fall off, become undone all the time. Mark checking the headlight beams  Checking for Emissions.  All good!  Checking the usual stuff on the ramp!  Im good for another two years!! Goos also gave me a dust cap for the Jaguar bleed valve. So I can fix that tomorrow! Jeroen |
|
| (5)
Thanks
|
| The following 5 BHPians Thank Jeroen for this useful post: | digitalnirvana, Leoshashi, R2D2, Thad E Ginathom, VivekCherian |
|